
I have my last guest post for you today from one of my good friends and fellow glitter gal: Jen from Aggies Do it Better! Jen has a serious love for blue polish so it was only fitting that she would create a blue nail art design for this post!
Follow the jump to read more from Jen and find out how she created this look!
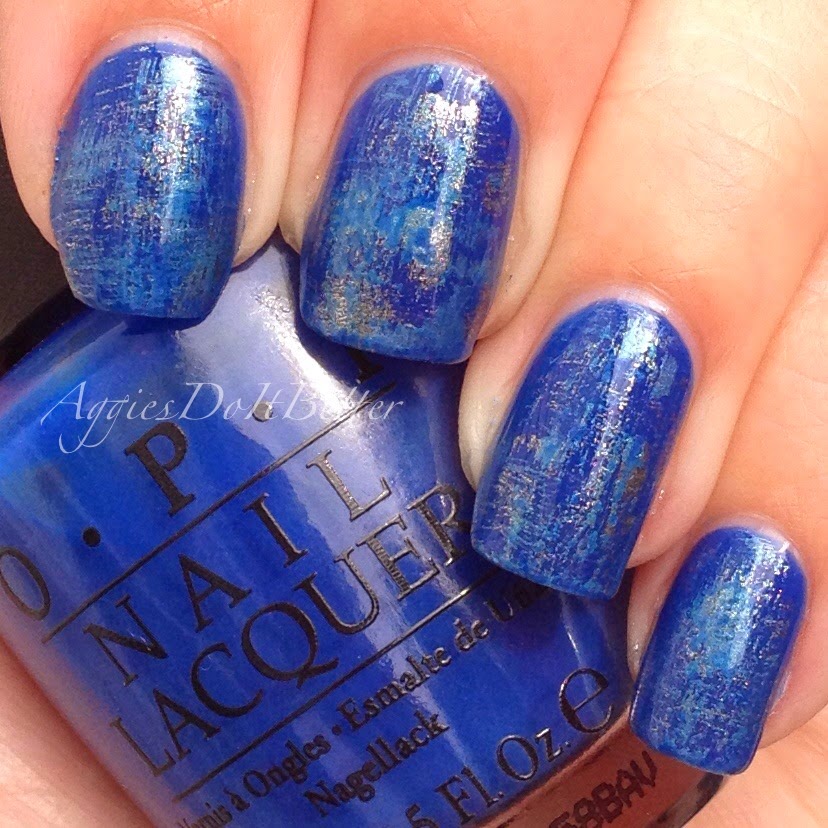
Hey guys! Thanks Danele for having me on your blog! The look I created is one of my favorite techniques to do....it's called "Dry Brush"! I love it because I rarely have a design on both hands, but this is super fast and simple, and when I wore these nails I had this design on all 10 fingers and it only takes minutes! I chose a base color and 2 accent colors.
.
I started with a plain royal blue base, OPI Dating a Royal (one of my favs!)

Then, with your first accent color (I used OPI Haven't the Foggiest, a metallic silver), scrape as much polish as you can off the brush into the bottle and make wispy light brush marks on your nail. Less is more!

Next, take your second accent color ( I used OPI Dining al Frisco, a frosty light blue) and do the same thing. You can make all your brush strokes going the same way or going perpendicular to each other (my preferred look).

That's it! Sometimes if I feel like my base color is too covered up I'll take it and do a few dry brushes on top. If you like textured finishes you can leave it, or add a non smearing topcoat to finish!

Thanks again for having me Danele, and I hope you are getting lots done in your new home! See you guys later!
Make sure to check out Jen's blog Aggies Do it Better! You can also find her beautiful nail art on her Instagram account @aggiesdoitbetter.
I hope you enjoyed my Guest Bloggers this week. They all did such a wonderful job creating beautiful designs. Thank you ALL for taking the time to write up your posts. What was your favorite design this week? Which design would you attempt to do?

I started with a plain royal blue base, OPI Dating a Royal (one of my favs!)
Then, with your first accent color (I used OPI Haven't the Foggiest, a metallic silver), scrape as much polish as you can off the brush into the bottle and make wispy light brush marks on your nail. Less is more!
Next, take your second accent color ( I used OPI Dining al Frisco, a frosty light blue) and do the same thing. You can make all your brush strokes going the same way or going perpendicular to each other (my preferred look).
That's it! Sometimes if I feel like my base color is too covered up I'll take it and do a few dry brushes on top. If you like textured finishes you can leave it, or add a non smearing topcoat to finish!
Thanks again for having me Danele, and I hope you are getting lots done in your new home! See you guys later!
Make sure to check out Jen's blog Aggies Do it Better! You can also find her beautiful nail art on her Instagram account @aggiesdoitbetter.
I hope you enjoyed my Guest Bloggers this week. They all did such a wonderful job creating beautiful designs. Thank you ALL for taking the time to write up your posts. What was your favorite design this week? Which design would you attempt to do?
No comments:
Post a Comment